In this tutorial I'm going to show you how to create a gold 3d padlock.
Let’s get started!
Creating the padlock basic shape
Step 1
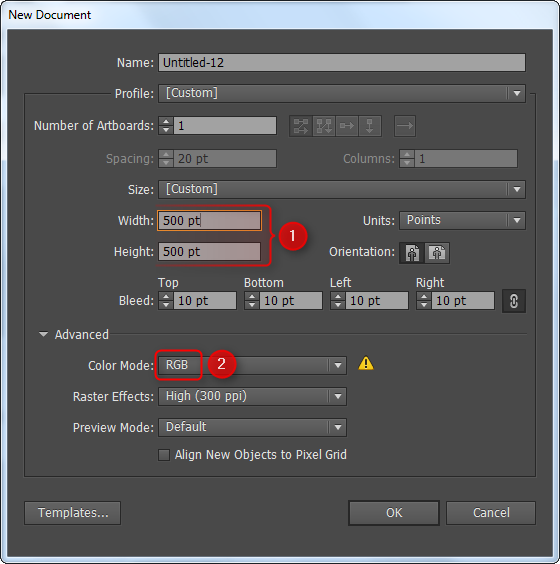
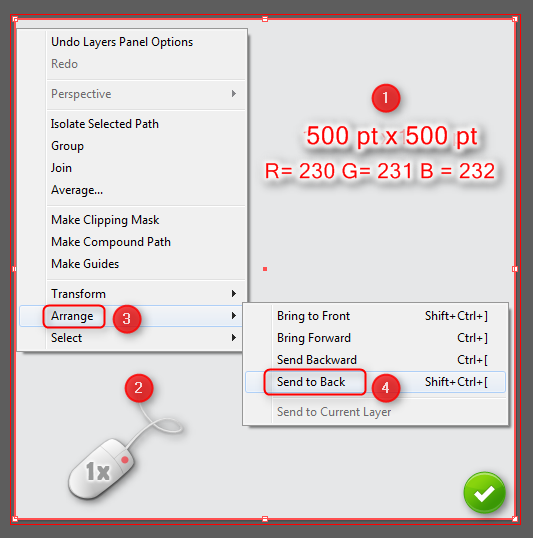
Open Adobe Illustrator and create a new document. Go to File > New. Create a New RGB document with 500 pt x 500 pt Width and Height.Step 2
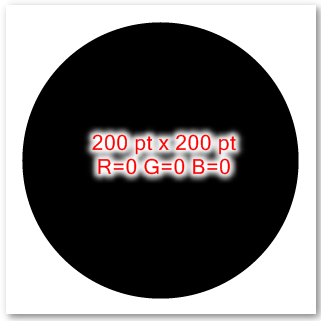
Take the Elipse Tool and draw a circle 200 pt x 200 pt. Fill it with black (R=0 G=0 B=0).Step 3
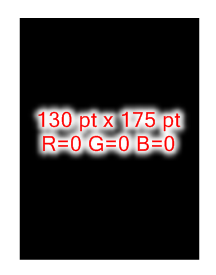
Now create a rectangle using a Rectangle Tool. It should be black and has 130 pt width and 175 pt height.Step 4
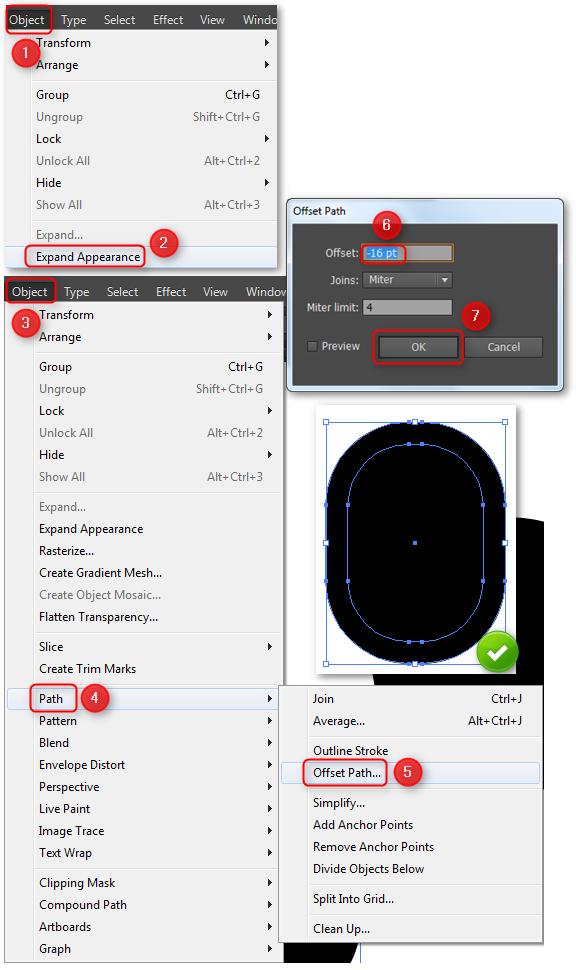
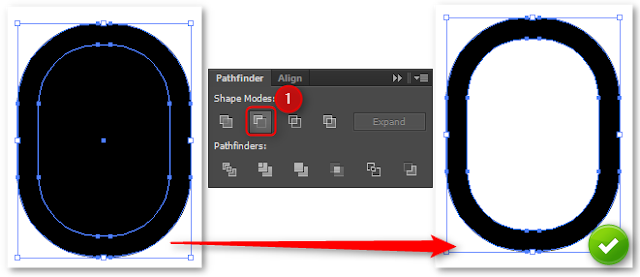
Select the rectangle and go to Effect > Stylize > Round Corners. Set Radius to 60 pt and click OK.Now we have to expand our object. So choose from menu Object > Expand Appearance. After that select rounded shape and go to Object > Path > Offset Path. Set Offset to -16 pt and click OK.
Step 5
In this step select object and in Pathfinder Window(If you don’t see it, go to Menu > Window > Pathfinder) click Minus Front.Step 6
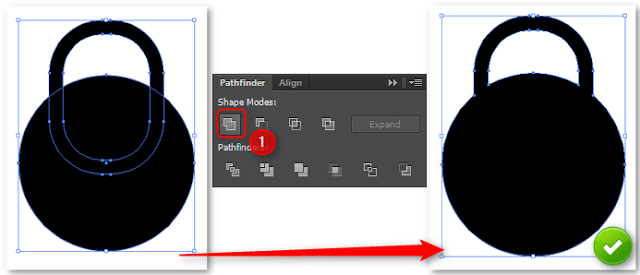
Now you have to move our shape above the circle. Then select both objects and in Pathfinder window click Unite. The basic shape of padlock is almost done.Step 7
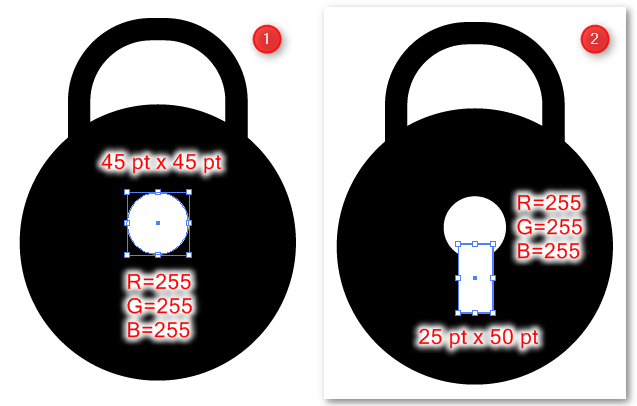
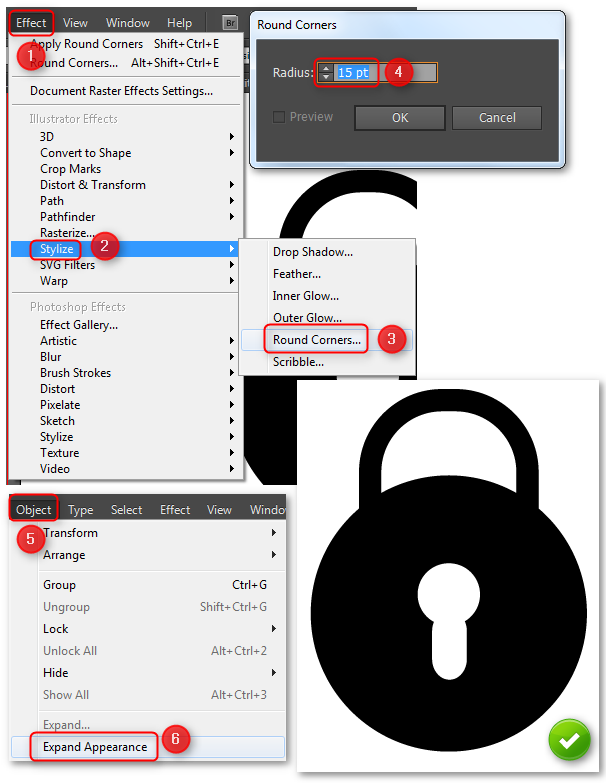
We still need a keyhole. So draw a white (R=255 G=255 B=255) small circle (45 x45) and rectangle (25x50) in the middle of padlock.Select rectangle and go to Effect > Stylize > Round Corners. Set Radius to 15 pt. Keep rounded rectangle selected and choose from menu Object > Expand Appearance.
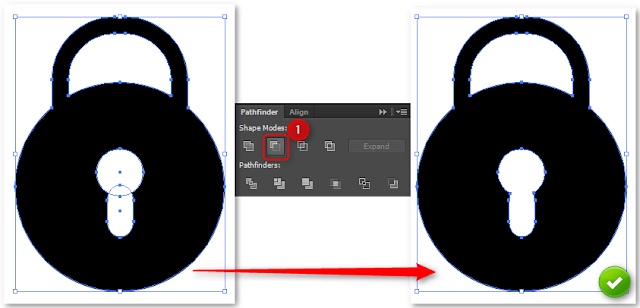
Last thing to do in this step is making one shape from all objects. So select the padlock and the keyhole and in Pathfinder window choose Minus Front. The basic shape is ready!
Creating the 3d padlock
Step 1
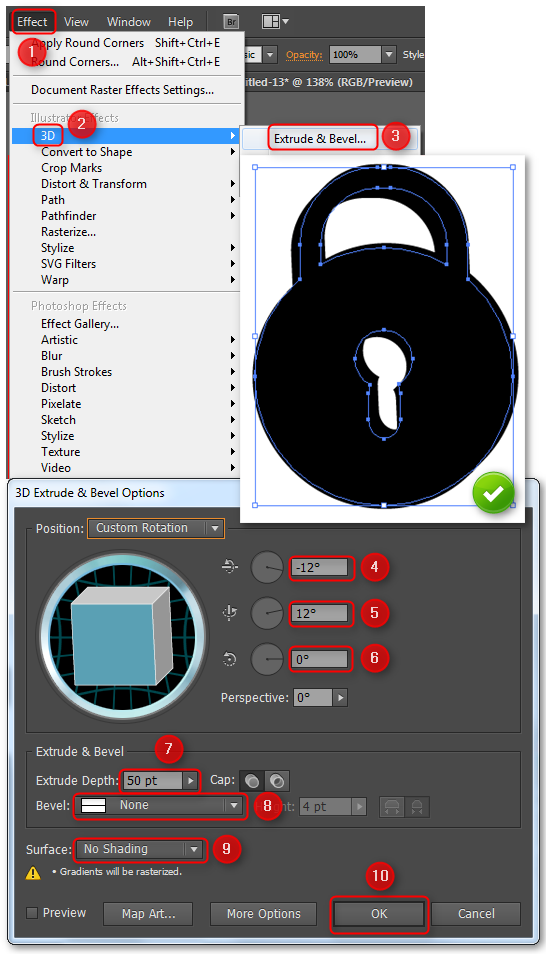
Select the padlock and go to Effect > 3D > Extrude & Bevel. Set all parameters like on the photo below (4-9) and click OK.Step 2
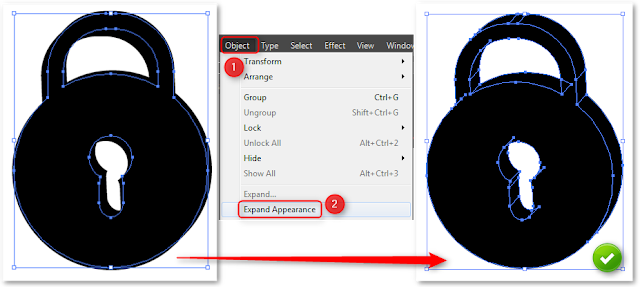
In this step we need to improve our object. Some of the paths are unsuitable to give them a gradient. To correct this paths we use Direct Selection Toll and Unite option. (Direct selection Tool is located in Tool Panel on the left. Unite option you can find in Pathfinder Window). So select one set of path after another and unite them like on the photo below.Step 3
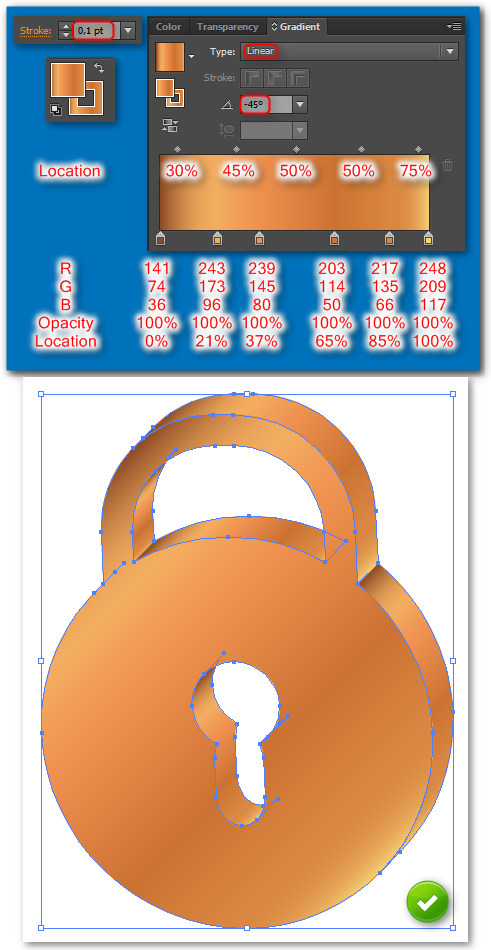
Now is time to give a gradient to our 3D padlock. Select all and fill it with linear gradient with Radius - 45° and colors shown in the picture below. Give the same gradient to stroke and set it to 0,1 pt.Step 4
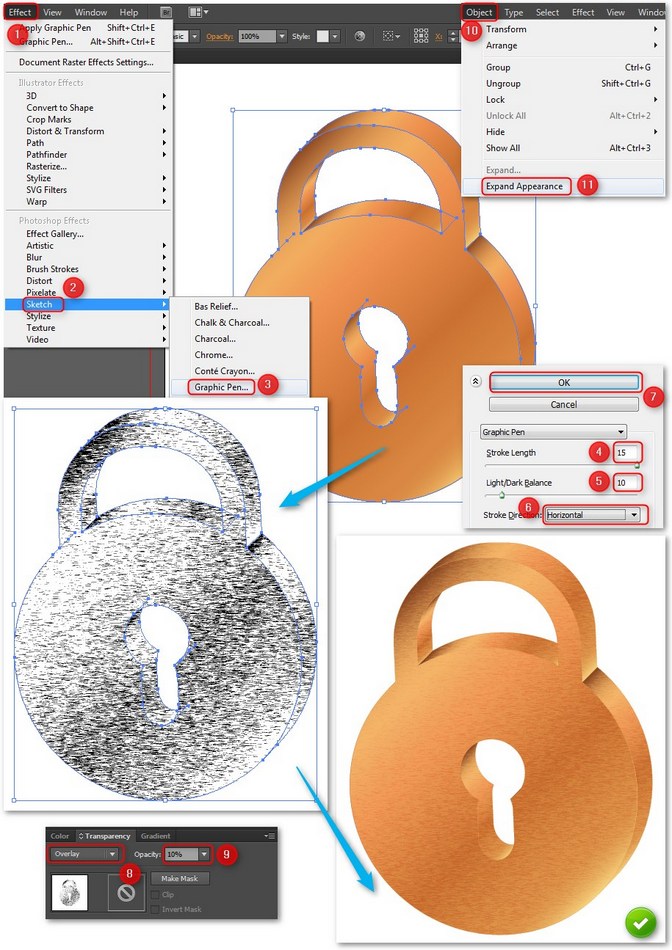
In this step we make a nice old metal texture. Select the padlock, group it (CTRL+G), copy (CTRL+C) and paste in front (CTRL+F). Then select only new padlock (this one in front) and go to Effect > Sketch > Graphic Pen. Set Stroke Length to 15 and Light/Dark Balance to 10. Stroke Direction set to Horizontal and click OK.Now in Transparency Window change Opacity to 10% and choose Overlay. After that Expand texture by clicking Object > Expand Appearance. In the end select all and group it together (CTRL+G).
Step 4
Draw a dark grey (R=65 G=64 B=66) rectangle 75 x 120, and place it behind the key hole (right-click > Arrange > Send to back). After that select all and group it (CTRL+G).Creating the background and shadow
Step 1
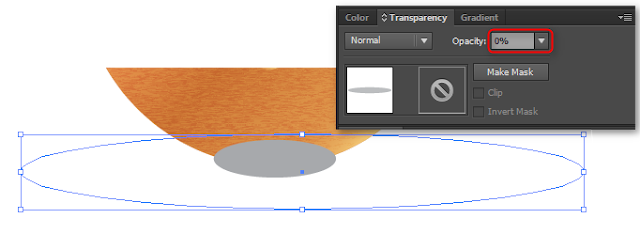
Draw two ellipses at the bottom of padlock. First one should has 300 pt width and 40 pt height, fill it with light grey (R=188 G=190 B=192). Second ellipse should be much smaller and has 65 pt x 20 pt. This one fill with little darker grey (R=167 G=169 B=172).Select the bigger ellipse and in Transparency window change opacity to 0%. It should be invisible.
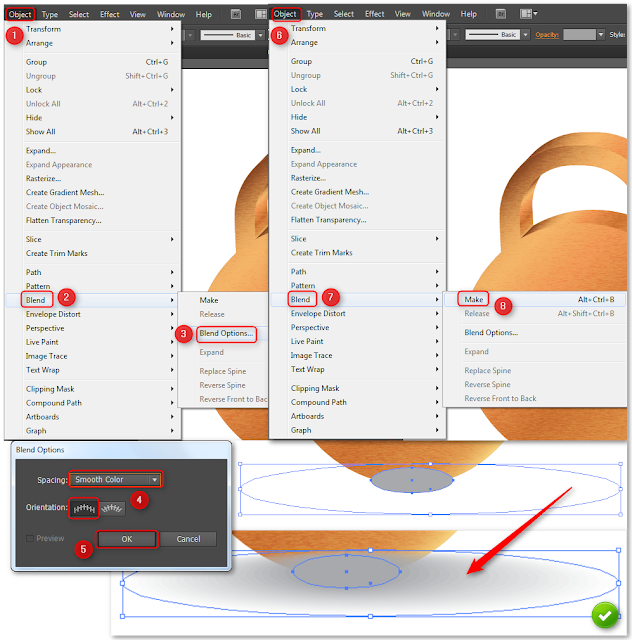
We need to check blend options, so choose from Menu Object > Blend > Blend Options. Make sure that in popup window spacing type is Smooth Color and Orientation is Align to page (1st one). If everything is good press OK. Now select both ellipses (invisible and grey) and go to Object > Blend > Make. The shadow is pretty nice.
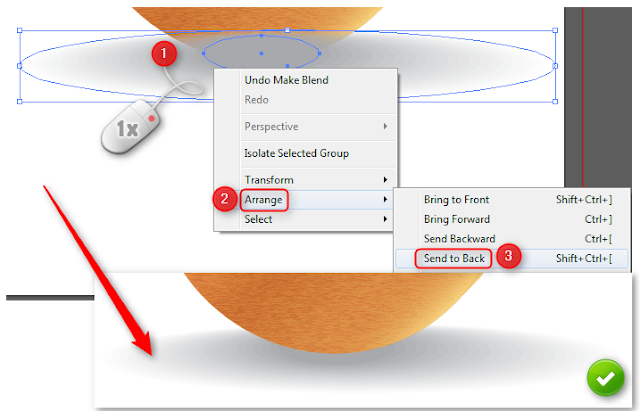
We have to do last thing in this step, which is moving the shadow at the bottom of padlock. Right - Click your mouse on the shadow and in popup menu choose Arrange > Send to Back. You see the effect below.

